Showing posts with label projects. Show all posts

3.03.2014

Humongo print


You can see the kitchen progress has been stagnant for a bit. Figuring out the new counter tops put a damper on things then along came round 2 of the stomach flu (this time C had it) and colds for the rest of us. Lucky C followed up the stomach bug with a head cold...so yeah, not much is happening with that.

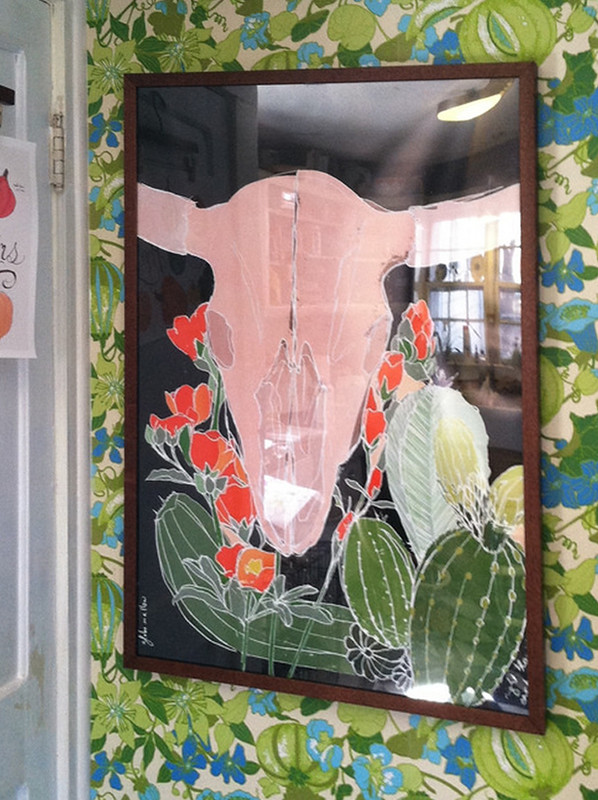
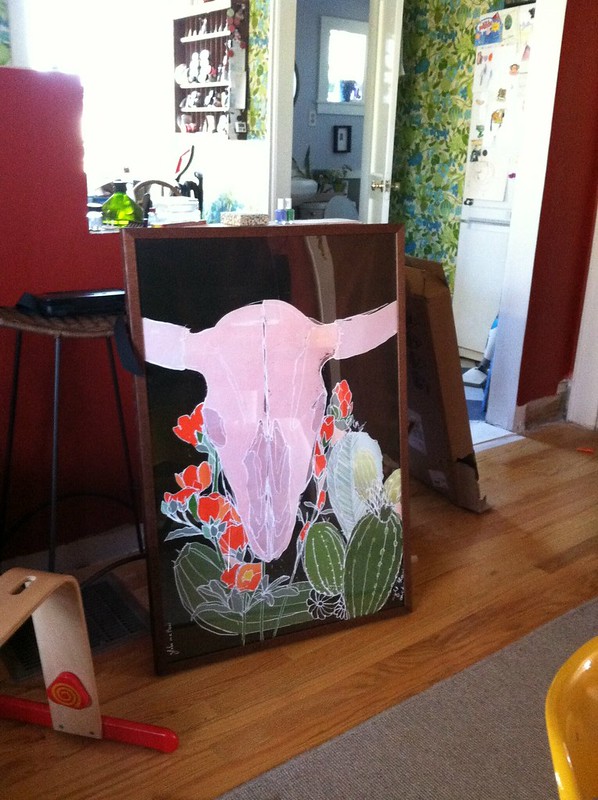
I did, however, FINALLY get the O'Keefe inspired drawing printed in a humongo size (24" x 36") and framed in a basic walnut frame. I haven't had time to get nice shots of it, but I'm so excited (and dare I say enamored) with it, that I want to show it off. A lot.


6.11.2012

The pitter patter of progress

Look! Just for you I created a fun survey where you can tell me which type of column you'd like to see on our house.(Woo hoo! Lucky you!!)

Create your free online surveys with SurveyMonkey, the world's leading questionnaire tool.

Though I'm not sure this picture says a lot, compare and contrast with this one and see all the work we've done.


Mabel went to Nana's and Paw Paw's so I thought we'd spend the weekend solely working on the columns, getting the project finished. There are, with us at least, certain methods to our DIY madness and sometimes we have to be honest with ourselves about these projects. Money is limited, and it is the facet we most often have to remember.

Despite my hope for a big unveil this morning, we had a budget set aside of less than $80. Most of that ended up going into reciprocating saw blades. We bought a $20 one meant for cutting iron which turned out to be overkill; a $3 blade for thick metal was actually the blade we needed. When you're talking about an $80 project, $23 takes a big cut (no pun intended). It didn't leave us enough to get the wood for the facade of the columns, and we decided to wait to get that wood anyway. For a nominally larger cost, we can get a higher grade board from a local lumber yard rather than from the big box store. A higher grade board will mean less knots and mars, making the finished column smoother and much prettier.

This coming weekend we'll both have paychecks to dole out for the finishing wood and trim, so until then our yard will remain (as one friend deftly put it) one trampoline shy of redneck gold. All of that is to give a glimpse inside how our renovations work: with time, ingenuity, and a little bit of spending money. Oh, and a generous Nana to keep the little one distracted and happy all weekend--essential to success.

It took an entire day to get the iron work down and the 4 x 4 (actually 2 2x4s laminated and screwed together) cores for the new columns up. That "entire workday" happened on Saturday, after I spent 6 hours volunteering at the community garden. My body still hurts.

On Sunday Charlie mended the fence while I built a small retaining wall from some 4 x 4s we had on hand. Having the dogs in the fenced area most of the time, they've created paths where they run laps around the perimeter of the space. That path, even on a gently sloping hill, has created an erosion problem which, in turn, created soil build up around the fence at the bottom of the hill. The soil build up pushed the fence every which way, making it lean and wobble. Once again the fence is perpendicular to the ground and we're already seeing and hearing the pitter patter of progress.

4.09.2012

Sunday Projects

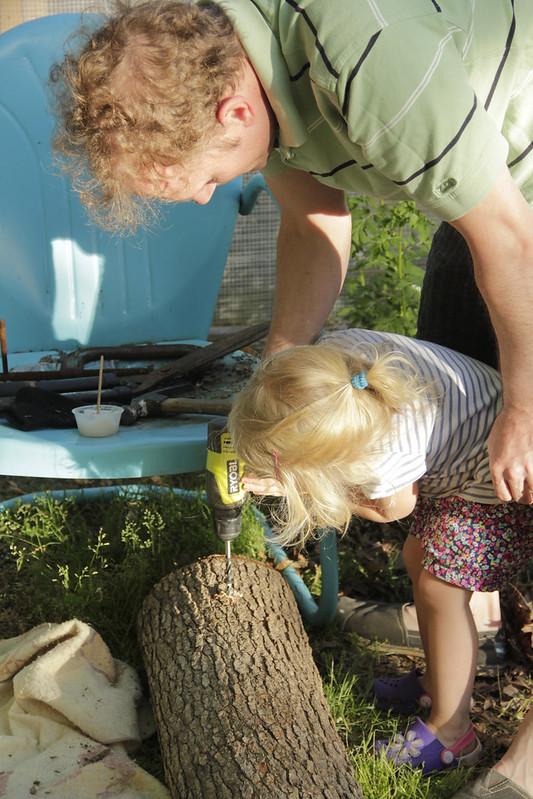
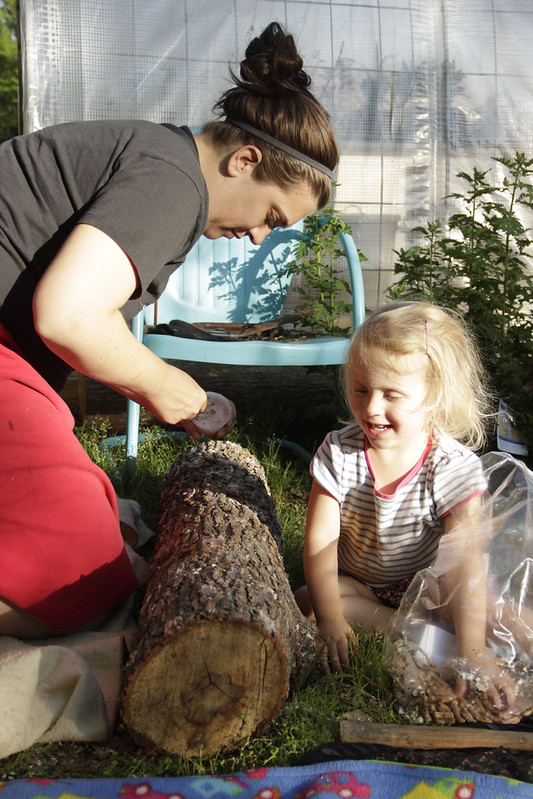
When we've got projects we try to find a way to engage the kiddo. She's eager to learn and do what we do, so with a little guidance (and sometimes extra personal reminders to have patience) we give her tasks and she gets involved. Sunday morning she helped make pancakes, then later in the afternoon she helped us inoculate several oak logs with shiitake mushroom spawn.


How many 2 year-olds do you know that can already pad their resume with construction experience, chef's assistant, and mushroom grower?

2.22.2012

The $3 (plus the odd scrap or two of building materials) trellis


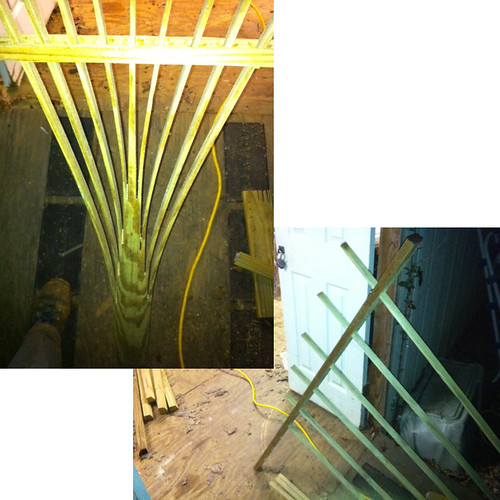
My oldest brother, Todd, has the gardening itch this year (actually it might be garden pox judging by his scratching) and is converting his front yard to a small farm. I promise to get more pictures of his projects, but first wanted to show off his $3 (plus some bits of building materials he had lying around) trellis.

The basics? taking a 2 x 4 and using a table saw to cut it down into lattice strips, while leaving about 6 - 12 inches at the base uncut. Cut some scrap wood  to create 2 spreaders to fan the boards apart. Todd used screws with scrap pex pipe (cut to about 1-inch lengths) instead of spacers to attach the trellis with wall anchors into the brick facade of his house, but any sort of strong, rigid pipe-like material would work.


We're moving our hops to a sunnier location this year, and a couple of these trellises will help 'em reach for the sky.

Are you planning a garden this year?  Check out this great post that spells it out for the beginner gardener.

2.21.2012

Practicing Clutter Bug Restraint

Remember this drawing? I turned it into a repeat pattern and sent it off to Spoonflower to have fabric printed. I had an idea that if it turned out OK I'd use it in the laundry room as a curtain. I picked the cotton voile and ordered 2 yards. It's sheer enough to diffuse bright light, while opaque enough to maintain a good amount of privacy.


There are still a few touch ups left to make the laundry room finished, but I'm so happy with it. I've done my best to keep the clutter to a minimum, which is not a strong point for me. This particular nook of the house gets a good amount of sun, making it a favorite napping spot for 2 little kitties, but it also heats up pretty quickly in the summer. The sheers will diffuse that heat while allowing the natural light in. Plus I think the oranges in the curtains tie the weird orange rug into the room design; it might just stay after all!


The sewing table is covered in a tan cow hide, leftovers from a reupholster project. The brown laminate top was just too industrial for the space. Leather, fortunately grips to the table so the sewing machines don't dance around while in use.


That blank wall is tempting me to hang some art, but I'm holding out, waiting on some extra funds to properly frame a photo by Abby Powell. Since we usually take on an anything goes attitude with decorating, I feel like this is the closest room I'll ever have to a Mossy Shed.


There you have it: the quietest, sunniest room in the house. Inspiring space for folding laundry or blah-blah-yawnsville?

2.10.2012

Food Forest Example

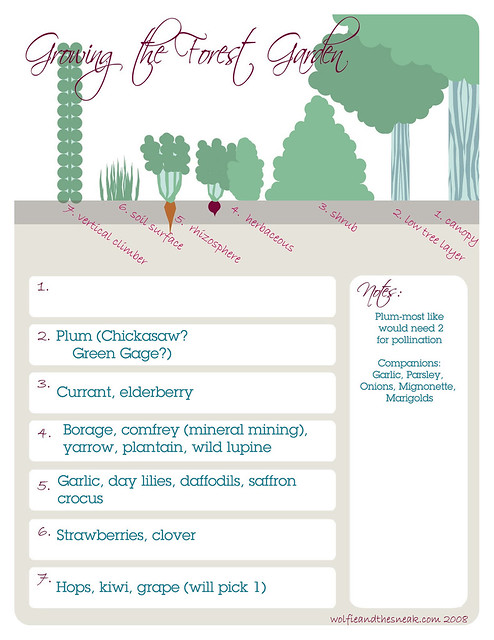
A while back I posted a worksheet to plan a food forest garden. I've used it a couple times, but thought I'd share this one since it's time to start thinking about spring gardening.


This particular food forest/guild will be planted in a Charlotte, NC community garden and will be about 20-feet in diameter. The plum tree will be the center, the outer circumference will be planted with daffodils, garlic, chives, and crocus and act as a deterrent to deer and squirrels.*** The other layers of plants that will benefit the tree and each other mutually, including gathering nutrients and attracting/deterring insects.  The idea is to have a garden that provides it's own nutrition, mulch and soil building, while providing an assortment of food to those that tend the area. It's a commonly used permaculture technique to provide larger yields and require less work; just the way I like it.

Filled with herbs and fruit, this could be quite a tasty garden!

***Though I don't think there's actually true squirrel or deer deterrent!

1.09.2012

A brief intro to our indoor composting station

In case you haven't noticed, we take our compost pretty seriously. There's a worm bin in the kitchen, and passive piles (sometimes hot...but to be honest I haven't had much time to keep turning them so they're passive for now) in the yard. The chickens do a lot of compost work by eating veggie scraps, but we don't give them spent coffee grounds, onions, garlic and a few other things; our worms get those.


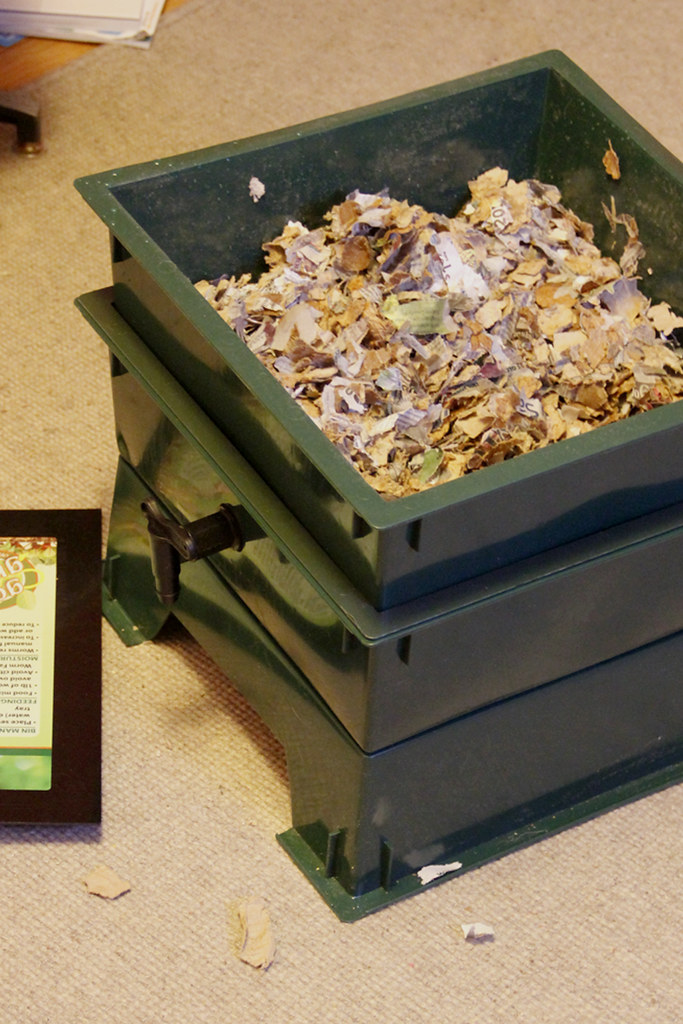
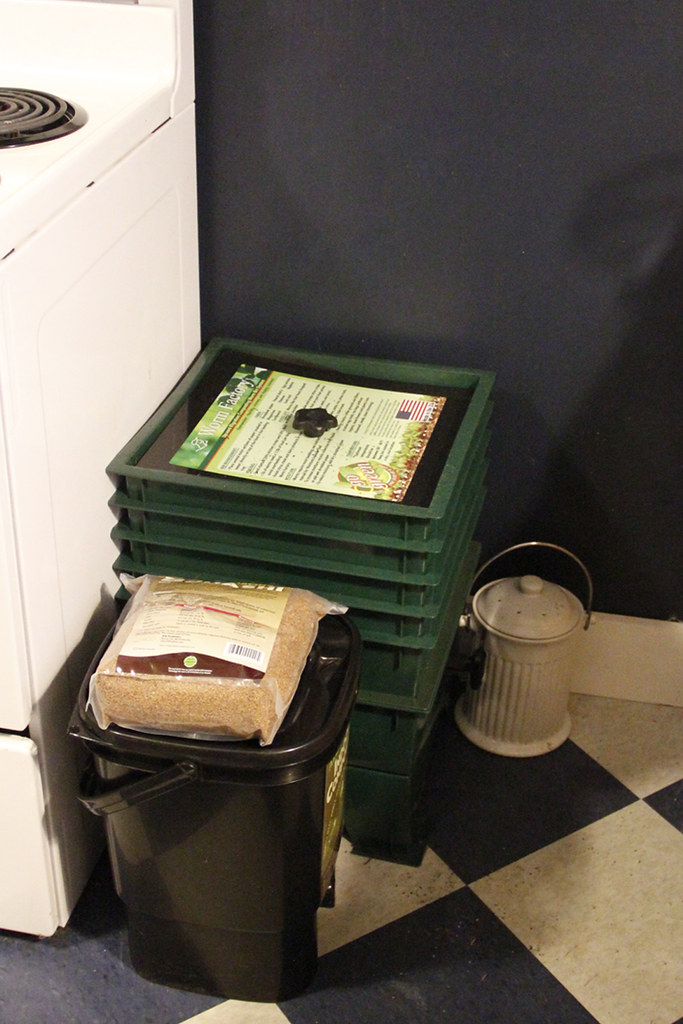
The worm bin, though was too awkward for our new kitchen arrangement. In order to get into some of the cabinets the bin had to be moved, and worms don't particularly care to be bothered with that. They like to have little by way of change, so I'd been considering a vertical worm bin for some time. We'd kept them going for 3 years in the storage tote bin, I finally decided it was time to move them to something a little fancier: a Worm Factory. Lucky for me, I know a guy.

I got in touch with my friend (and fellow Master Composter) Stefan and ordered the Worm Factory and a bokashi bucket. {Because if you're going to have worms in your kitchen you might as well have fermenting waste as well, right?}

Bokawha? Bokashi is an anaerobic form of composting. You're basically fermenting the food scraps. I thought we should add that to our composting repertoire because you can add bones and dairy to the bokashi bin.


Adding meat to my diet way back when created a new challenge for our household food waste. Before, when there was meat in our house, it was only Charlie's meals and I wasn't a fan of touching/preparing the stuff, so everything was of the heat-and-serve variety that no longer resembled the formerly living creature it once was. No skin, no bones, no fat to cut off.

Now, though, the meat comes straight from the farmer; it looks like meat, there are bones, there is skin, there is fat. Usually trimmed fat and skin go to the furry kids, but bones pose a risk so they are sometimes used for broth preparation, but ultimately go to the landfill.


After little rearranging in the kitchen, the worms are in their new home and the bokashi has started a-brewing. I'll keep you filled in as things progress, but for now I love the fact that I can open the cabinets without shifting everything around. A bonus for the new set up? The two new bins take up less space than the old worm bin alone!

1.05.2012

Oh, this new old thing?

I spent a little time over the holiday break working on home projects that weren't on the agenda. This particular one started by cleaning out a closet, finding a piece of upholstery that was about 7 yards long and wondering what I'd  bought it for. I couldn't and still can't remember. Surely it was a great price, though? As far as the fabric goes, I think it's a polyester faux brown pony hide sort of texture, but it's soft and almost velvety. Very very comfy.


Like all good procrastinators tend to do with all the more important things needing to be done in mind, I set out to make a slip cover for our hand-me-down sofa. If you couldn't tell which is the better version of the sofa, it's the velvety brown version on the left. I promise the slip cover is an improvement from the worn fabric of its bygone days, despite my lack of photography skills. I didn't have enough fabric to do the pillows, so I'm still deciding what to do about them. Even before the new look we'd just keep them in a pile somewhere in the corner of the room and use bed pillows for a little extra comfort.

I'll save reupholstering those for the next bout of major house projects...you know, for when I need another excuse not to do something.

We've been enjoying the new old sofa quite a bit  since winter weather has moved in. Lots of TV time and family snuggling, plus it's nice to have a cover that can be tossed into the washer when a certain little someone decides to try out a glue stick on the furniture! Best of all? It didn't cost a new old dime!

10.07.2011

I finished my 30-day grain fast last weekend. After a couple experiments with wheat since them I've decided to stick with very limited wheat. Seriously, people, a couple days after the detox I had a sandwich followed by an hour of very sharp pain.


Seems there might be something to this gluten sensitivity after all, sayeth the nay sayer. *sigh*

Here's to a wheat free weekend.

8.22.2011

I'll mostly let the pictures speak for themselves, but now I have a 
whole wardrobe of clothes in womens sizes 2-6.
What to do with them...

8.08.2011


I say it every Monday, and I'll say it again...weekends just aren't long enough. I finished another custom logo and a few garments for an upcoming photoshoot while C played with Mabel. That kid will color all day long if she gets the chance to. We've just got to master the art of keeping the crayon/marker/pencil on paper and not on headboards/body/everywhere else.


It's much too hot to do anything outside, and the snap beans are finito, so there are gaping holes in the garden begging for attention. It'll happen, but in the meantime we're sticking to the air conditioned spaces around Chez Sneak.

How was your weekend? Fun stuff happen?

7.14.2011

Sunshine and honeysuckle

See? I told you I had some drawings in the work--a pretty little bit of California honeysuckle for your Thursday morning? It's a west coast native, our east coast counterpart is coral honeysuckle, but for the purpose of this illustration {and it's other use, a project still in the works} I liked the form of the California flowers better.

Later today the kid and I are going to pick as many green beans as we can. I have a friend who is so tired of green beans he's just abandoned the picking--dilly beans and pressure canning are in my near future.

You know what else is in my near future? Homegrown, fresh field peas. "H" to the ellz yeah!

7.13.2011

Sick Days

Don't forget to enter the contest to win a copy of Sarah B. Hood's We Sure Can!
Contest closes July 20, 2011, 11:59 PM, and limited to North American readers {to keep postage down}.


As happens with kids {spoken like I have a lot of kid experience} Mabel had pinkeye this past weekend. Ever have it? Swollen eyelids, pink and itchy eyes, oozy tear ducts. Really strange {and probably a bit scary when you can't open your eyes in the morning} for a toddler to experience.


We spent the days being lazy {and yes, the TV was turned on} snacking on fresh summer fruit. Cherries are giant hit! If you don't believe me, just check out that juice stain.

Since the little one wasn't feeling her best, she took a few long deep naps. That meant I had good amount of time to work on some of my own projects. This one is a logo, did you know W&tS does custom logo work? There are a few prints in the works. I'm just hoping I won't have to wait for another sick day to get around to them...I'm not planning on another sick day {for me or M} for a long, long time.

6.14.2011

How to make a creepy wall-mounted guitar/ukulele holder

Here's a little something I made for Charlie a while back, but when I finished he said it was creepy. I put it away, thinking I'd come up with a non-creepy idea for all the materials.


Last night, though, while I was making dinner I kept moving his ukulele around to keep it out of splatters way. When things got to the point I could just leave them to simmer I went and dug out the creepy antler plaque and hung it up in the fishing lodge. Out of my hair, finally it has a home.


Materials: Unfinished wood plaque, naturally shed antler tines (found as dog chews at a feed supply, but available on eBay as pictured), wood screws, strong craft glue, paint, sawtooth hanger


Here's the quick and dirty how-to:  Measure the slimmest part of the ukulele neck. Figure out the width of the neck plus the radius of the base both antler tines. Mark then drill 2 holes that distance apart. Paint the plaque; I went with kind of a trophy/plaque motif. Apply glue on the flat end of the antler and a dab around the drill hole on the front side, center the antler tine over the hole and screw it in place. Make sure, if the antlers curve, you have the curve pointing up. Repeat with the second antler and voila! You're almost finished! Let the glue dry, then attach the sawtooth hanger at the top of the back. Now it's ready for hanging. Then all you have to do is proudly display your ukulele!


If you're interested in learning to play a ukulele, but aren't sure about investing in the instrument, might I suggest this $23 DIY version? It may not be the fanciest instrument at the luau, but it works and sounds pretty good!

If you're wondering about the rooster on the back, it's a painting by Charlie's long-time friend Robert Childers. Robert (aka Dracula Bob) played the role of both groomsman and drummer at our wedding. We have 3 of his paintings, and each one is amazing: Skulls here, Banjo Player in our kitchen, and the other one I don't have a picture of.

5.11.2011

Early recap of KCWC so far

A quick recap of things I've made for M this month:


Then the first two things I made for the Kids Clothes Week Challenge. he wrap dress from Sunday. The pants I made on Monday were cute, but a little too slim for M.


Yesterday I went for a quick-n-easy project: a simple circle skirt. I used Made blog's tutorial but made a covered elastic waist since I didn't have any thick, fancy elastic on hand. I'm really enjoying picking through all the fabric pieces I have already. It's paring the back stock down while giving me a fun challenge to match complimentary patterns up. (If you want to make a circle skirt that fits 2T to 3T, I have a jpg collection in google docs to make the circle cutting easy as pie.)


If I decide to try another pair of pants, I have some super cute, colorfully striped fabric that would be just perfect for these flat front pants.

I think I only post pictures of myself in this plaid dress. It, too, has a circle skirt and is probably why I was determined to make one for M. I love to randomly spin around the house and watch it flare out. Other times I hoist it up like Melissa Gilbert/Laura Ingalls does at the beginning of Little House on the Prairie as she's walking through the fields.

Just for the record, M likes to spin around and see her skirt flare up, too.

5.09.2011

Kids Clothes Week Challenge: Day 1


It's Kids Clothes Week and this blog has a great list of tutorials to try. What is the Kids Clothes Week Challenge?

Want to join? Go to Elsie Marley's blog and sign up, join the flickr group if you want to show off your creations, and dust off the ol' sewing machine!

I cheated and started yesterday because I have to take time when I can find it. Using the "It's Mother's Day and I want to sew" excuse helped me get the time to do it, though. Here's what I made: a Prudent Baby wrap dress in a cherry print with a gingham skirt. The fabric is from the same batch as this dress; there are so many great fabrics in that batch that I'm eager to make more more more cute pieces for little M and I won't have to fork over any money for materials. 


I should've done it with snaps like they suggest, but couldn't find any snaps and when time is limited you just have to go with the supplies on hand. Buttons, I've got lots of cool, old, pretty buttons so I used those. I'd show you the button holes, but these button holes are actually way worse than the first button holes I ever made, so don't look closely. Just look at M's cute little face and then glance at the dress. 

4.13.2011

Shot through the heart

Image from the Verla Ivans shop.

A while back I gave C some arrows from Verla Ivans on etsy. He wants a real bow and arrow, and is planning on making the bow. These aren't real arrows, just pretty looking painted dowels, but I thought they'd satisfy his craving for at least a little while.


In typical Hi-C fashion, he took the arrows and ran with them. No, not literally, I mean he got all fancy creative and made a rack for them. If you look closely, the crossbar on the rack imitates the grip of a bow. I sure think it's pretty and I sure love that boy, being so creative and all.

1.17.2011

Change and Progress: Gaining Plenty

Before I ended up holed up inside for 3 days, I made a little chart for documenting resolution progress. You can click on the worksheet you want to use, or find links to them on the downloads page.


We {actually, C} worked on the chair a little more. I found out I was approved for my permaculture design certificate {Can I get a woot woot? What, you're not still stuck in the nineties like I am?} and getting all geared up for the Gardening Like a Forest workshop with Dave Jacke.


What else is goin on? 
Abbey is having a Valentine's giveaway.
Poppytalk kicks off Winter Colours Week with RED!
I'm enjoying Mothering magazine via Progressive Pioneer, and {thanks to her recommendations} have a long list of books to check out from the library.

How was your weekend? Whatcha got on your radar for the week?

8.24.2010

Sew Intense

I flickr-posted pictures of my dress in process last night and this morning I found a comment from Emira:

So you're telling me that eventually there will be time and space in my life to sew again?

Yes, yes, a thousand times yes! And you don't have to sell your soul to do it! But you do have to brush up on your negotiating skills and hone your selective hearing skills.


Between me and C, our negotiations went something like , "I'd like to take my motorcycle over to Tom's to switch out the bearings. Would that be okay?" "Yes. And I'd like to work on this new dress pattern I just got, but I need uninterrupted time to do it. Would that be okay?" These negotiations work better if you have a gleam in your eye that says, "I really need to do something for myself, please let me do this, please!"

Sometimes stinky diapers help with negotiations, they add a little leverage. The hardest part is if I'm sewing/drawing/having me time and I hear M crying in the other room. The urge to go find out what's going on is very strong, but I have to tell myself I need and deserve me time and I have to let Charlie stay in charge. {And also don't run into the other room every time you hear something that sounds cute and/or exciting.}

The details: Colette Pattern # 1004 {Eclair}; Alexander Henry Fulham Road Bluebells for the outer shell and an old calico sheet for the lining {not seen}; Hancock Fabrics Madras Plaid for the contrasting sash. The dress has gatherings, hidden pockets, a lining, and a hidden zipper, so it threw me right back into the ring of challenging sewing, but it's fun to watch it all come together. I'm not sure why I thought a dress with so much gathering at the hips was a good idea, though. . . hmmm.

{PS I put a few ready made etsy shop banners up in the ol' etsy store yesterday. Check 'em out, they're cheap!}

6.25.2010

I had so much fun working on today's post on Modish I want to do more more more recycled outdoor projects like every single pallet project Eren has completed recently. That table and those casters. . .*sigh*! Are chandeliers a new theme?

Then there is this lacy little number I found for a song in Trellis' shop. It's going to be part of next week's project. . . and has a little something to do with another recent theme.

Happy Friday folks! Are you planning on playing outside?